So I’ve felt inspired into making ornaments using cookie cutters this Christmas, but when I didn’t have the shapes I needed, I starting thinking if it was possible to make my own.
It occurred to me that I could make them using the aluminium from empty soda cans,so I goggled the idea and of course It has already been successfully tried before.So without a second though I made mine !
There is many awesome tutorials out there , but this is the method I followed putting together some ideas I found plus my own.
I hope you find it helpful.

“Making cookie cutters from empty soda cans”
MATERIALS:
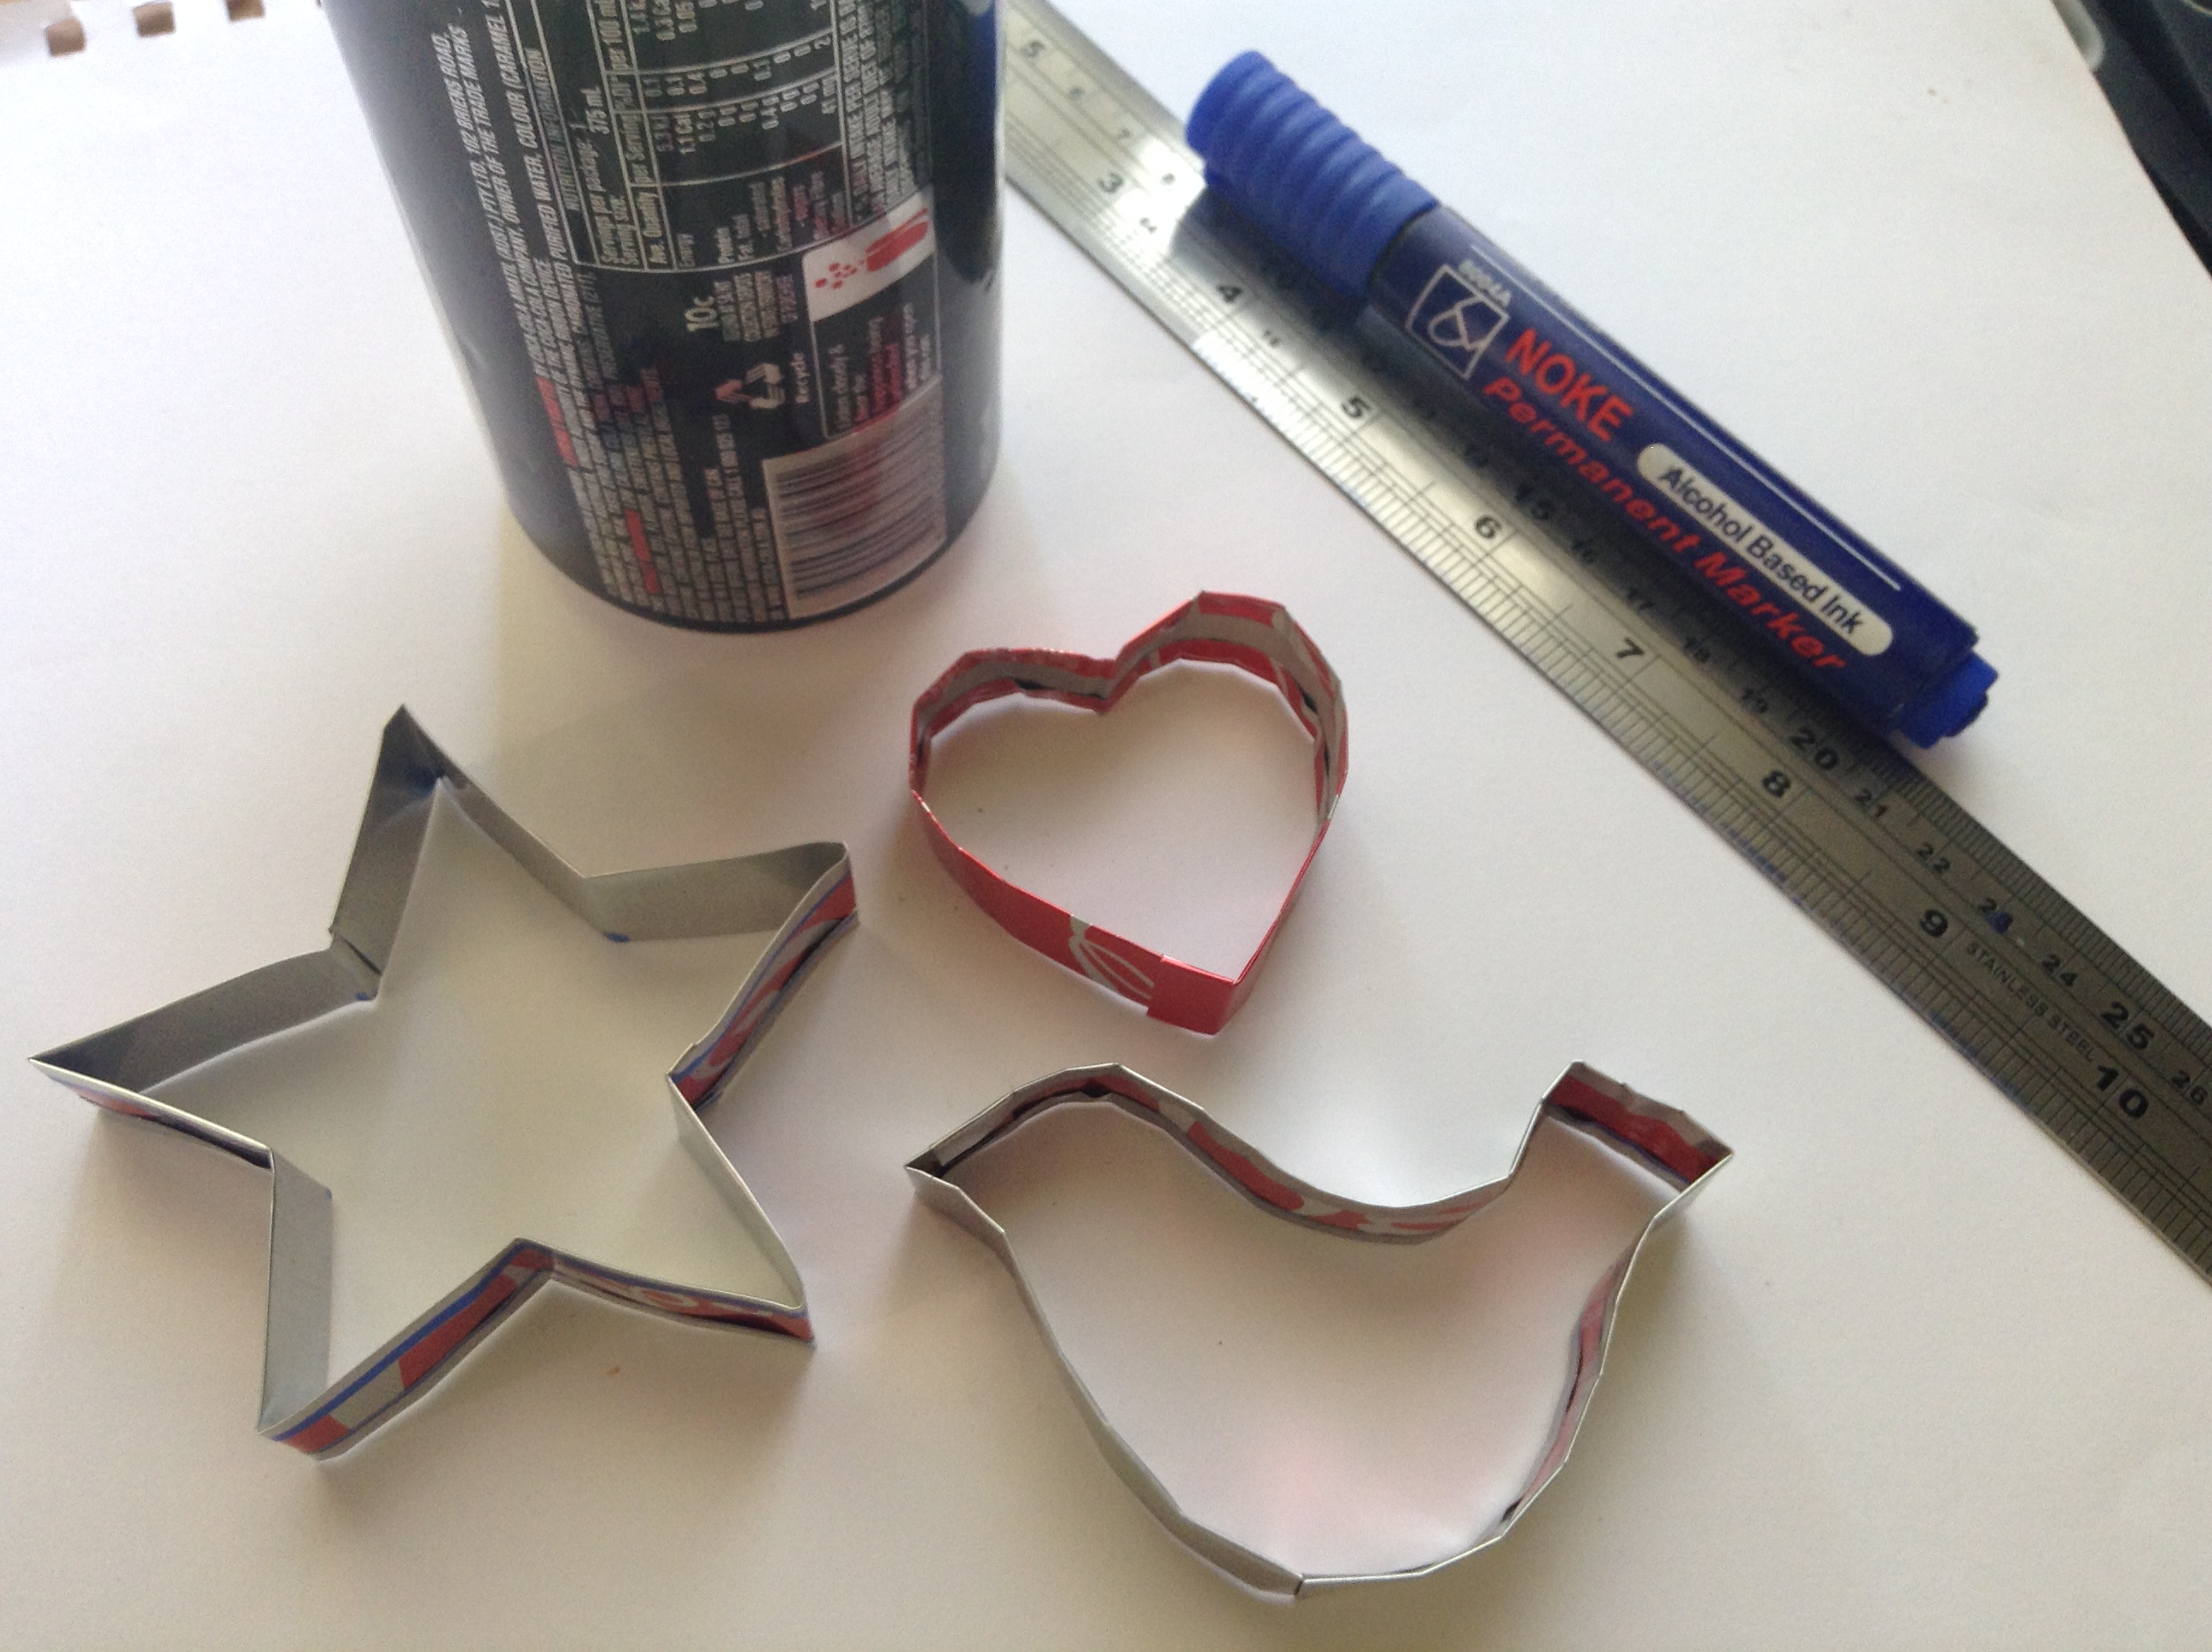
- Empty soda cans
- Sharp Scissors
- Sharpie marker
- Pattern
- Metal ruler
- Pliers

HOW TO:
Important NOTE: Be patient and cautions when cutting aluminium. The edges can be sharp.
- Cut the bottom and top of the can using strong, sharp scissors.
- Cut the remaining piece down the side so you are left with a rectangle.
- Using the marker and ruler, draw straight lines to form stripes (Mine are aprox 3cm wide)
- Cut along with scissors and bend the edges inside in using the ruler to bend and the back of the scissors to flatten it up. (Don’t use your fingers)

- Follow along the lines of your drawing, bending the metal strip to match the pattern.
- To make angles or corners bend with the ruler but don’t apply to much pressure or the aluminium will brake.

- Once finish : cut the extra metal strip if you have any, but leave a bit enough to interlock and seal the shape into form.
(as shown in photos below)

Interlock the ends using this method in the picture below

I also used this same method to join two metal strips and make it longer so I could complete the template of the the bird and star shapes.
There you have them!
TIPS FOR MAKING THE STAR SHAPE
- Measure the sides of the star and mark the metal strip so you know where to bend because in order to have an even shape, all of the sides must be the same length.
- Bend the metal stripe in a zig zag form
- Follow the drawing lines to match the shape.
- Cut the extra metal but leave enough space on the ends to interlock and close up the shape as I showed you above.
- Done!

Ready to use!! 🙂

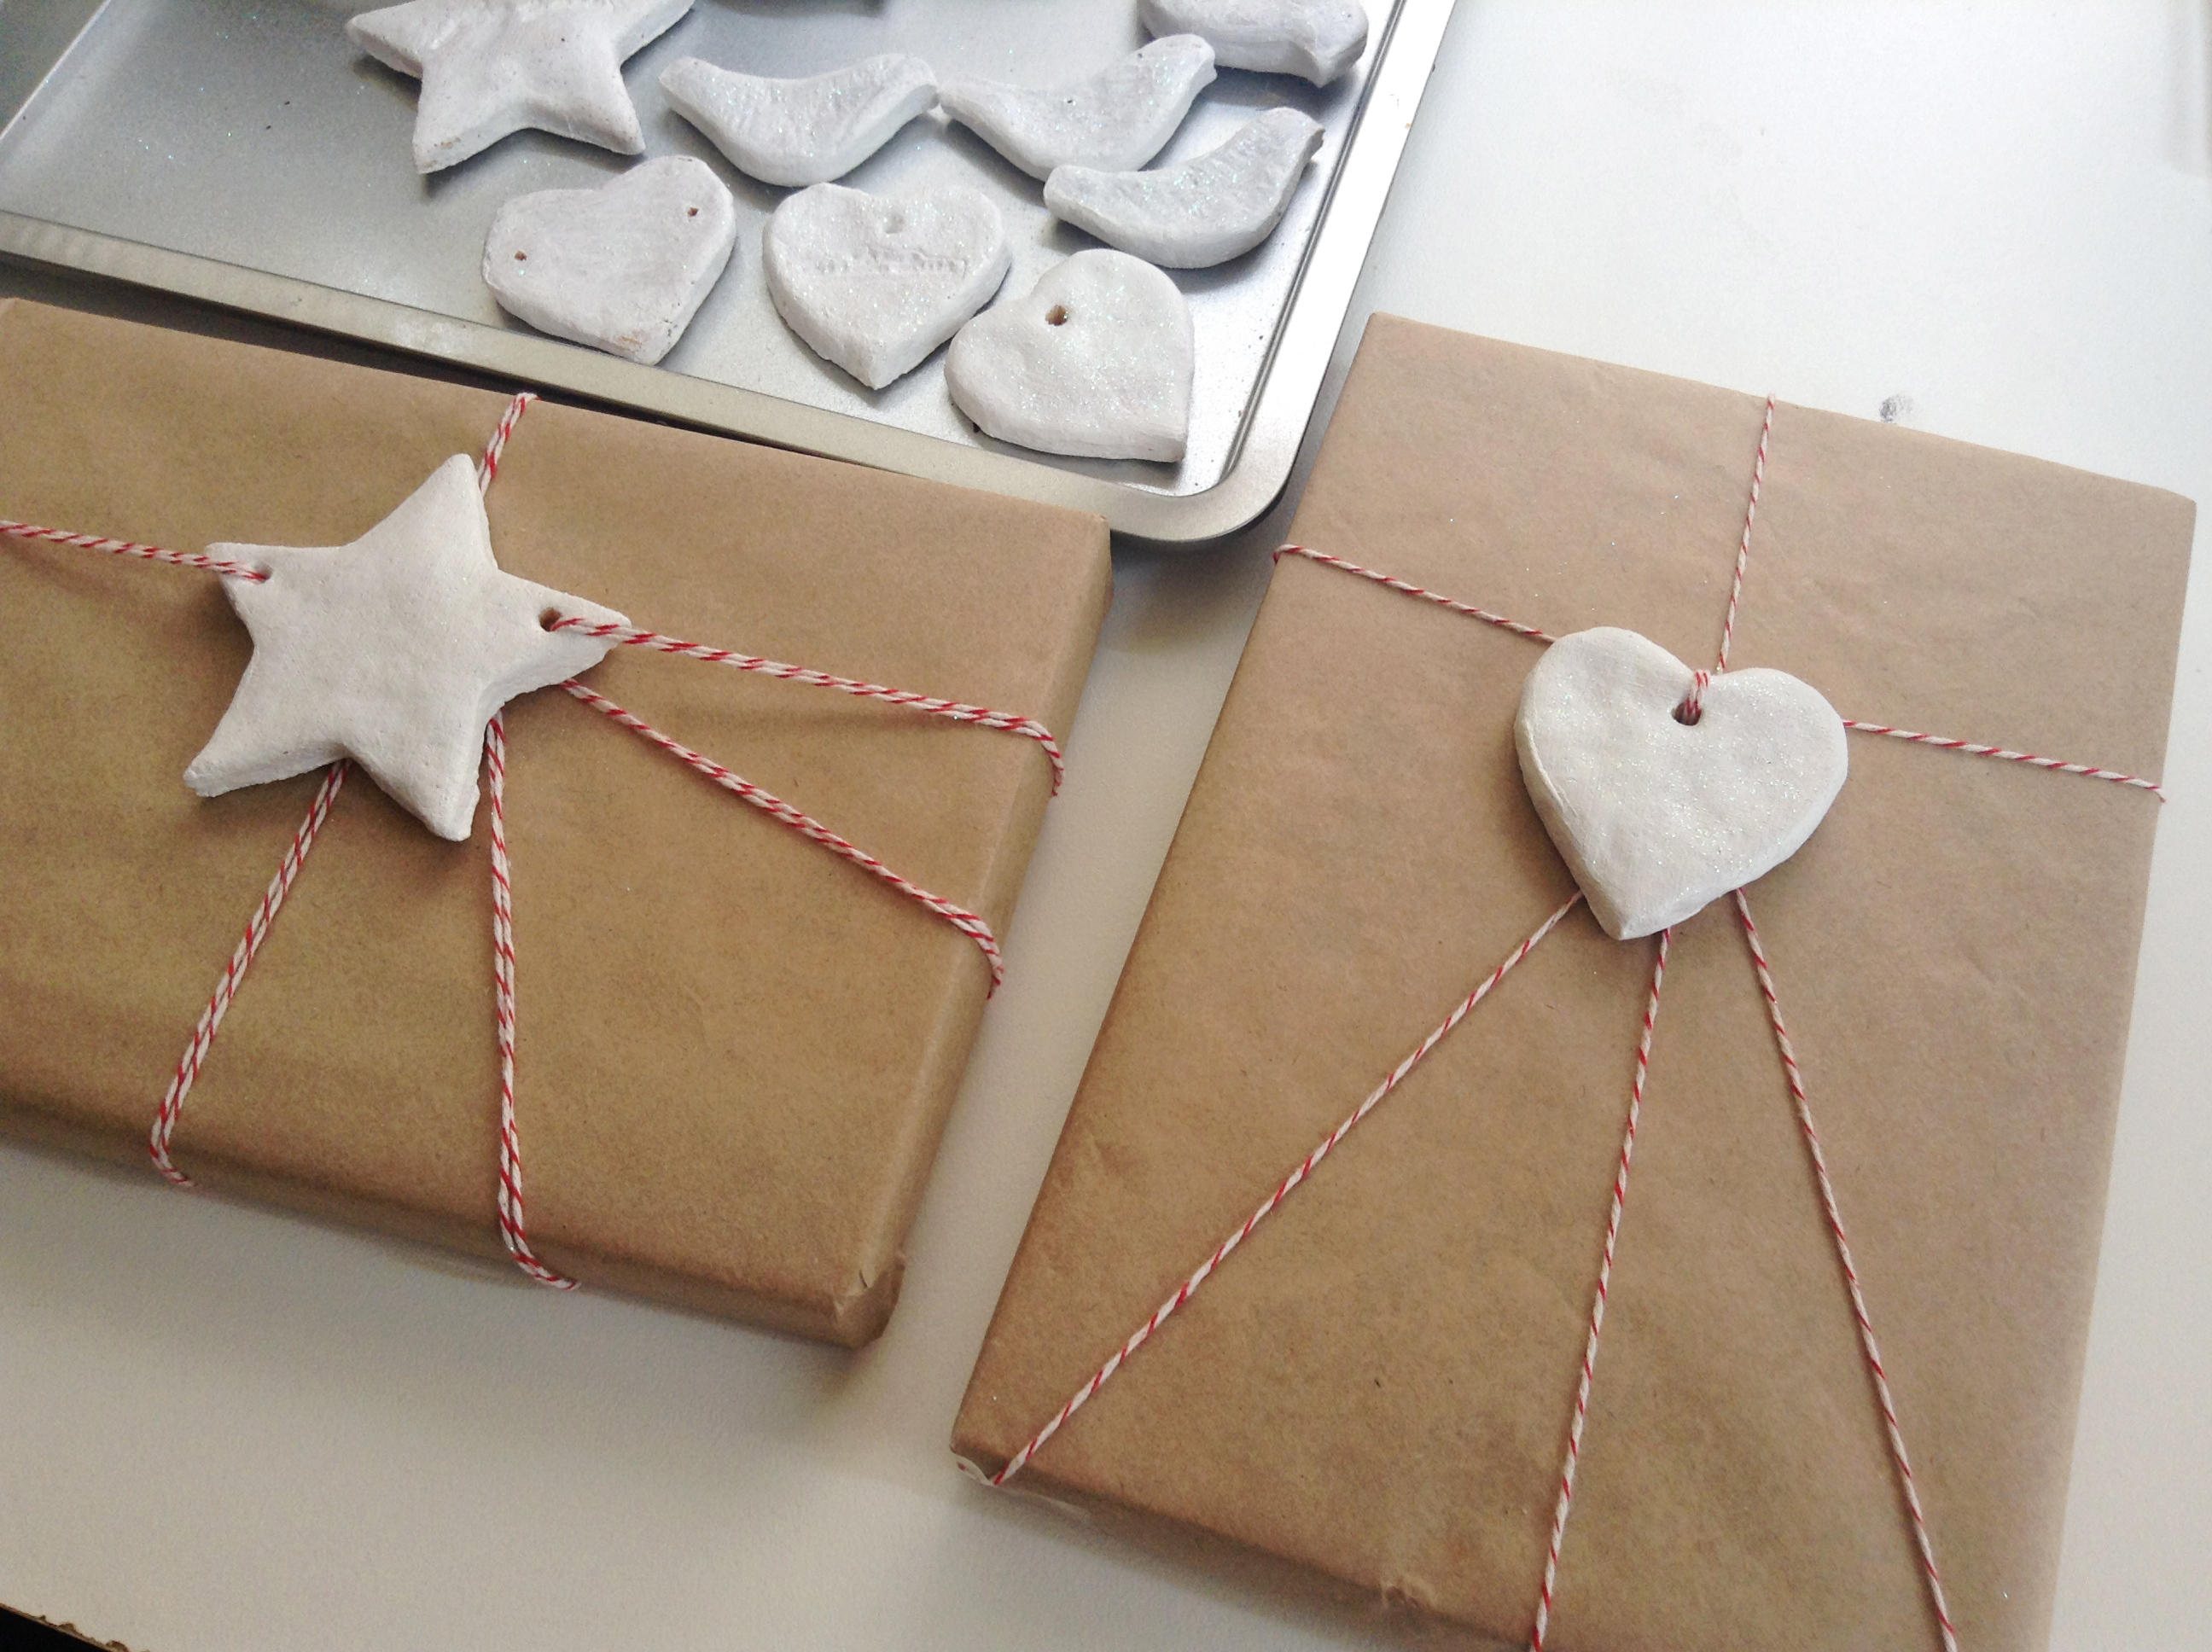
Don’t worry too much about the jaggedy edges (if there is any). You can always soften up the dough shapes using your fingers as I did with mine.

PS: In case you are wondering why my cookies have holes and lines, it is because I was making them ready for the Christmas Ornaments project I had in mind. You can find it here: “Salt Dough Christmas Ornaments”
Enjoy!

This post is also available in: Spanish
Leave a Reply