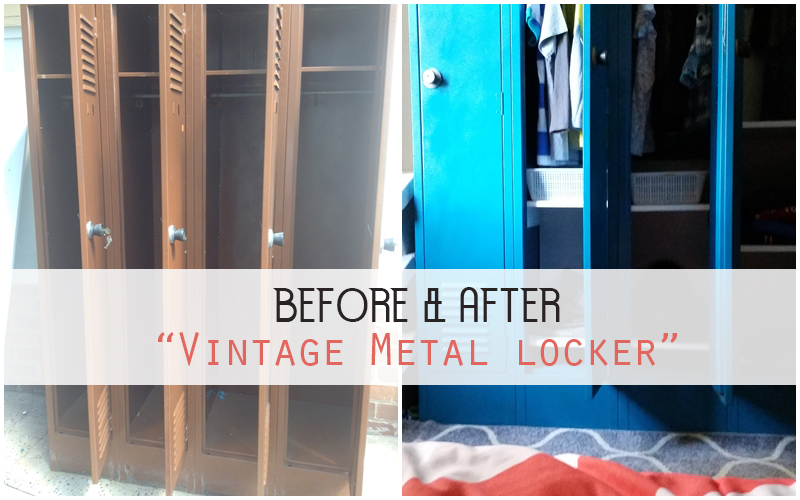
The idea of giving new life to objects that everyone has given up on has always excited me. To witness how with just a little love and imagination, the beauty of an object emerges from where no one else could see beauty before …. is fascinating!!!
This old metal cabinet has been one of the projects I’ve always wanted to make and I’ve finally finished.

Here are some photos of the process I followed and the end results. I feel so proud of myself!! And so happy that I am finally an owner of a Vintage Metal Cabinet. Well….My boys are as we are using it now as a wardrobe for their room 🙂
REVAMPING AN OLD METAL LOCKER
:: MATERIALS
- Wire Brush , Steel wool
- Comercial Rust Cleaner (Use gloves and a mask for protection)
- Rags
- Spray paint
- MDF cut to size for shelves
- Timber cut into size for shelves holders

1..:: Before you start this project, cover all the metal bits that don’t want to be painted with masking tape and make sure you are working in a very well-ventilated area.
2..:: Remove all loose rust by scrubbing with a wire brush or steel wool.
3..:: Apply the rust remover of choice to your piece. Then simply wipe off with a rag. Really stubborn stains may require a second application.
4..:: After all of the rust has been dissolved and removed, make sure to protect your item using a finishing rust-free primer and paint. The spray paint of my choice already contains Primer. I used 4 spray cans and a total of 2 paint application.

ADDING SHELVES
Adding the Shelves was probably the most tricky part. I was originally planing to use metal brackets to hold the shelves, but I didn’t have the right tools and it was almost impossible to make holes with the drill I had as the lockers were made of very thick industrial metal.
So I had to improvise and went back to the hardware store to buy timber slats cut into size to serve as the shelve holders.
I looked for timber that was thick enough to fit into the gap of the metal door so I could easily insert them without using any screws; just the pressure between the metal frame of the door and the back of the cabinet.
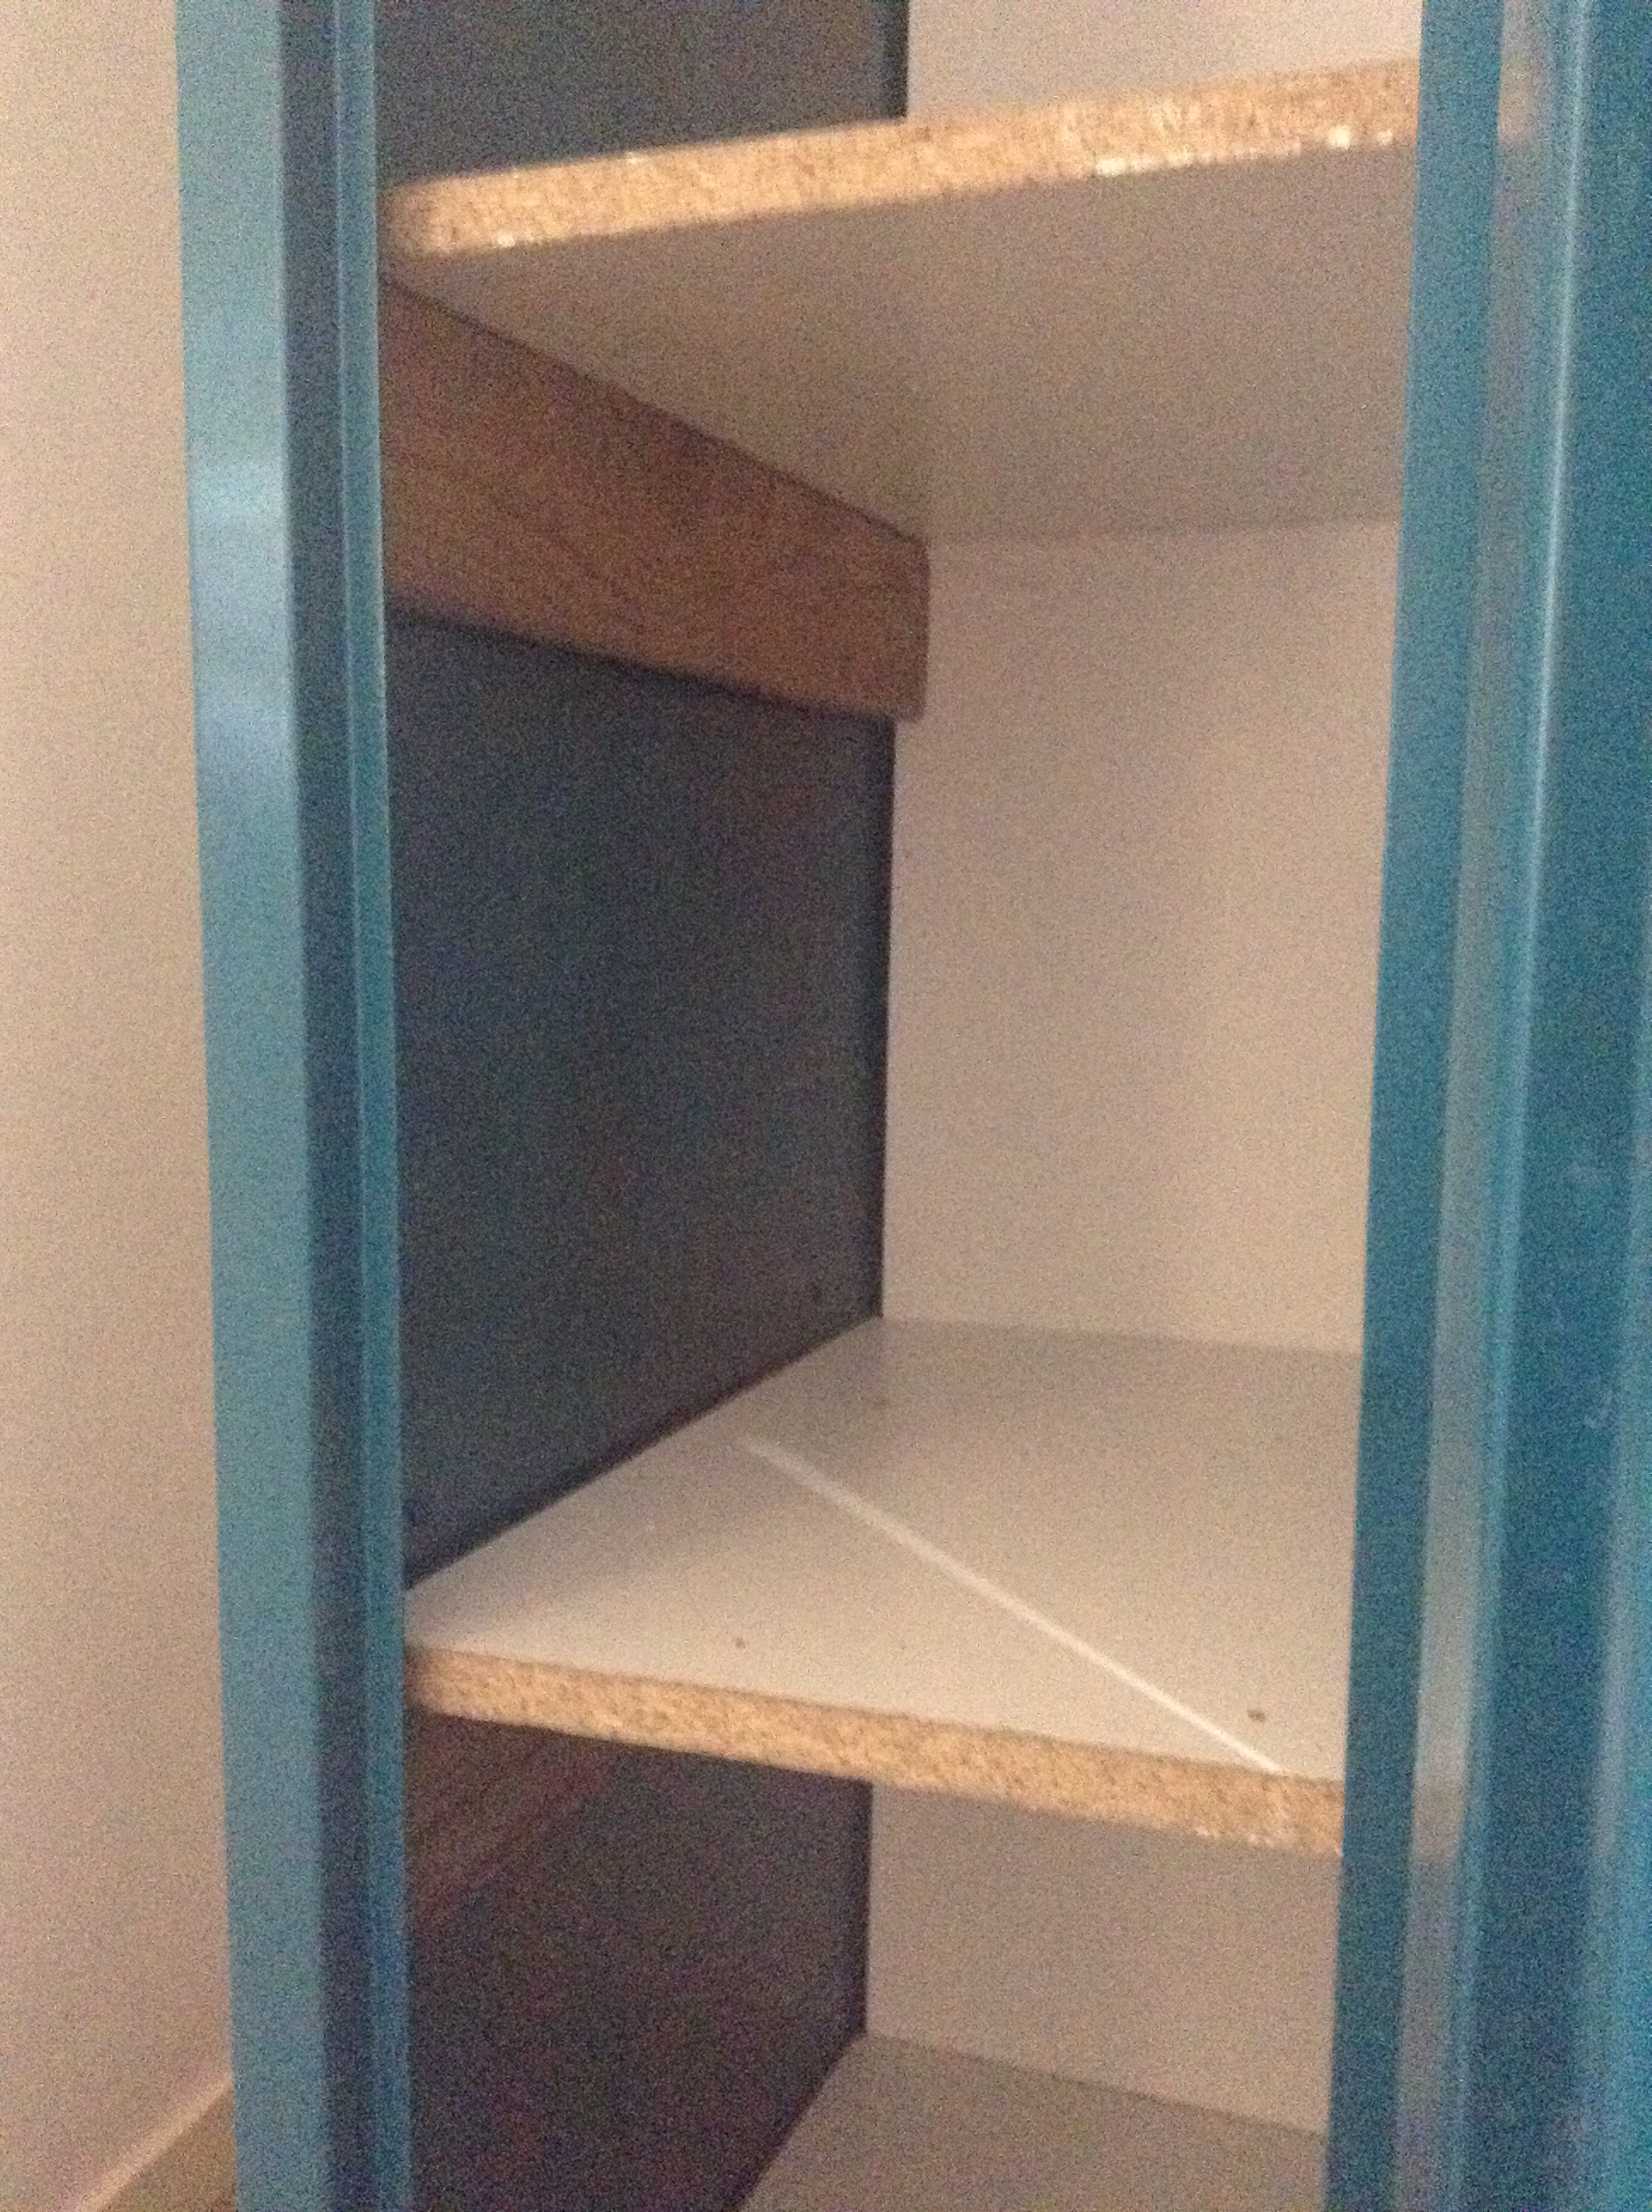

And this was my end result :

And two happy boys with a unique wardrobe in their bedroom just because Mum made it for them !!! 🙂


Leave a Reply